
I’m a regular speaker in front of large audiences and have used 360 videos and panoramas in my professional presentations for over five years. I often get rave reviews and find that 360s engage audiences and make my presentations stand out.
Here are my top ten tips for incorporating 360 videos and panoramas into your PowerPoint slideshows. These tips and techniques will take your presentations to the next level and will leave your audiences wanting more.
No Camera Crew?! Use 360 Videos and Panoramas Instead
One of the most exciting things about using 360 videos and panoramas is that you get to choose your point of view (POV) after taking the shot. With a 360 camera everything you see and experience is included in the shot. Once you get home and start editing on your computer you can focus on the subjects and views that convey your message or create the impact you are seeking.
This is like having your own camera crew along, taking shots from various angles with multiple cameras! Several top-notch editing programs can be used to edit 360 videos including Adobe Premier Pro, Cyberlink PowerDirector, and DaVinci Resolve which can be downloaded for free.
You might be interested in my related article How to Take Impossible Shots with Your 360 Camera, which delves into postproduction and choosing your point of view after taking the shot.
Don’t rely on the audio from your camera
Unless you are a pro film maker with the right microphone you will usually get poor audio quality – especially straight out of the camera. There will be distracting rubbing and creaking sounds, wind noises, and barely audible voices that would just add stress and strain for your audience. The last thing you want to do during a presentation is to make people want to get the hell out of there! Irritating noise can do that, so do your best to avoid it!
I usually mute the audio track and speak to the audience during playback or add some appropriate background music.
If you need the audio, for an interview for example, use an external microphone during filming or put a “dead cat” or “wind muff” on your camera mic. These awesome hairy little beasts help by blocking the wind and reducing wind noise.
Don’t Try to Embed 360 Videos into PowerPoint
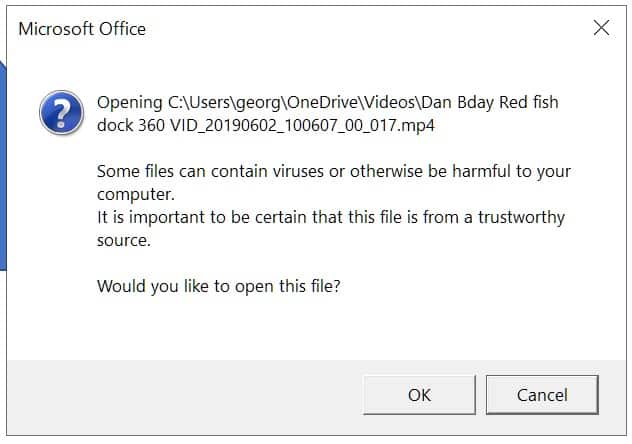
You can embed a 360 video into your PowerPoint, but it won’t look right.
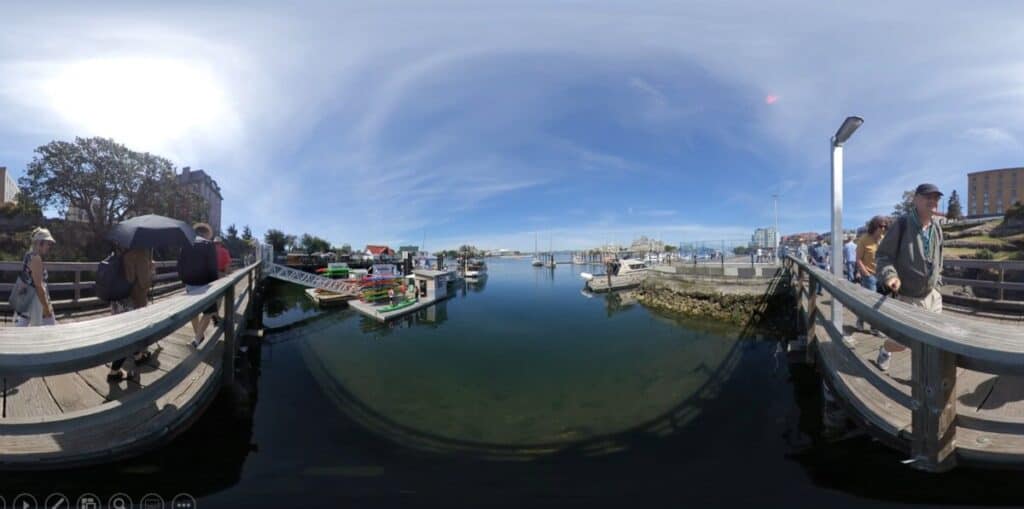
At the time of writing, PowerPoint doesn’t have the capability to view and spin a 360 video during a slideshow. PowerPoint will run the video OK, but it will be shown in equirectangular format that spreads the entire 360 flat on the screen – as shown below.
Trust me, audiences would get tired of looking at a video like this for more than a few seconds.
The best way to play a 360 in front of an audience is to link to an external file and play the video outside of PowerPoint – which brings me to my next tip!
Link to an external 360 file and play outside of PowerPoint
This is the best way to play a 360 video during a PowerPoint presentation in front of a live audience.
Here’s a quick and easy shortcut explanation on how to accomplish this:
- Insert a shape anywhere on your PowerPoint slide – like this triangle
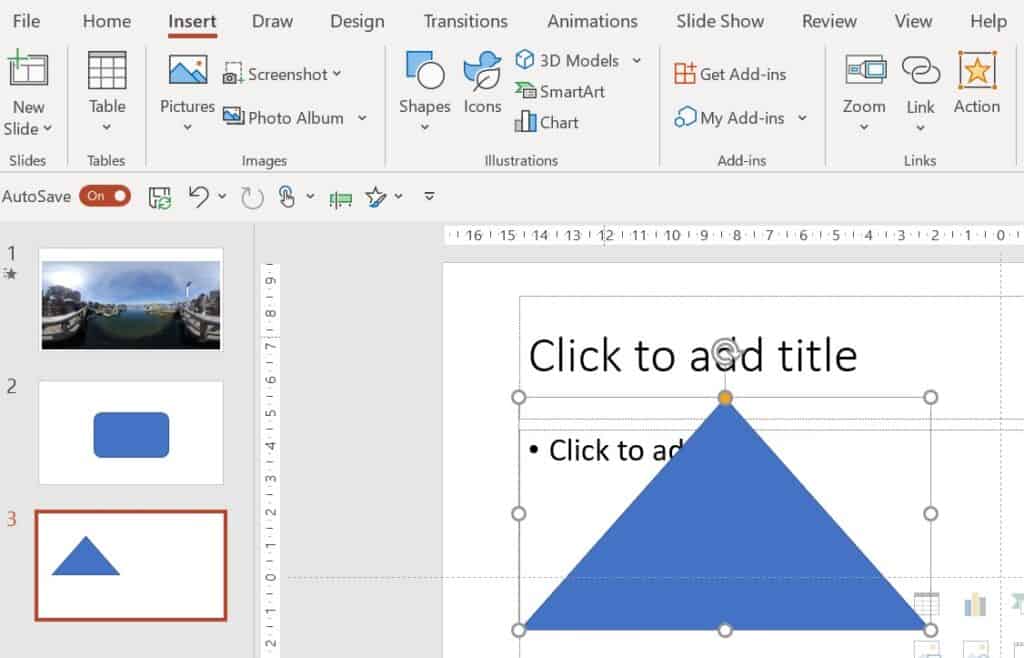
- Select the shape
- Go to Insert and choose Action
- In Action Settings, choose Hyperlink to: Other File
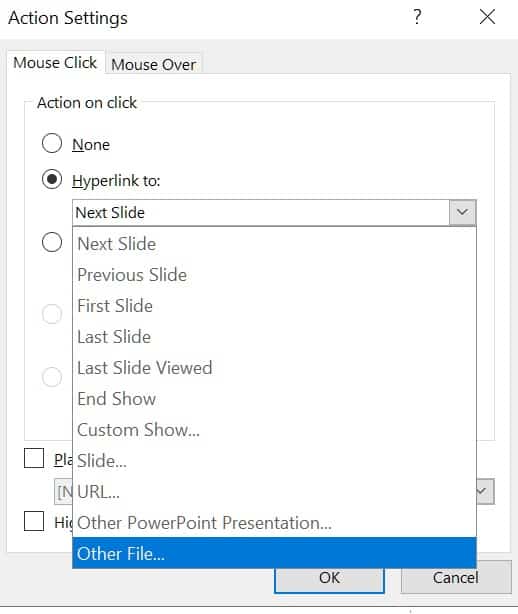
- Insert the path to your file and click OK
- During your presentation, when you arrive at the right slide, click on the shape to launch the video in the default video player.
- After the video is finished, exit the player and return to PowerPoint.
The main thing that I don’t like about this approach is the security warning that flashes up when you click on the shape to launch the video.
(If you ever discover a way to disable this security warning in PowerPoint, please let me know and I will make certain to include the solution!)
The frustrating thing is that you can’t turn this off – believe me, I’ve tried everything including editing the registry. Microsoft absolutely refuses to offer a way to disable this pop-up warning and it appears just when you are trying to impress your audience!
Even so, I still use this method for my presentations, because it is the quickest and most fool proof way that I know of for switching to an external video. Alternatively, you could have the video already sitting in a separate window ready to play, but I hate fiddling with tabs and looking for the right window in front of an audience. Doesn’t look very professional.
When you play a 360 video, you can spin and move the image as the video plays. On my touchscreen laptop I can move the image with my finger which is much more intuitive than trying to use a mouse or keyboard in the dark!
Watch me use this approach for the first time in front of a live audience of about 300 people. I was glad it worked!
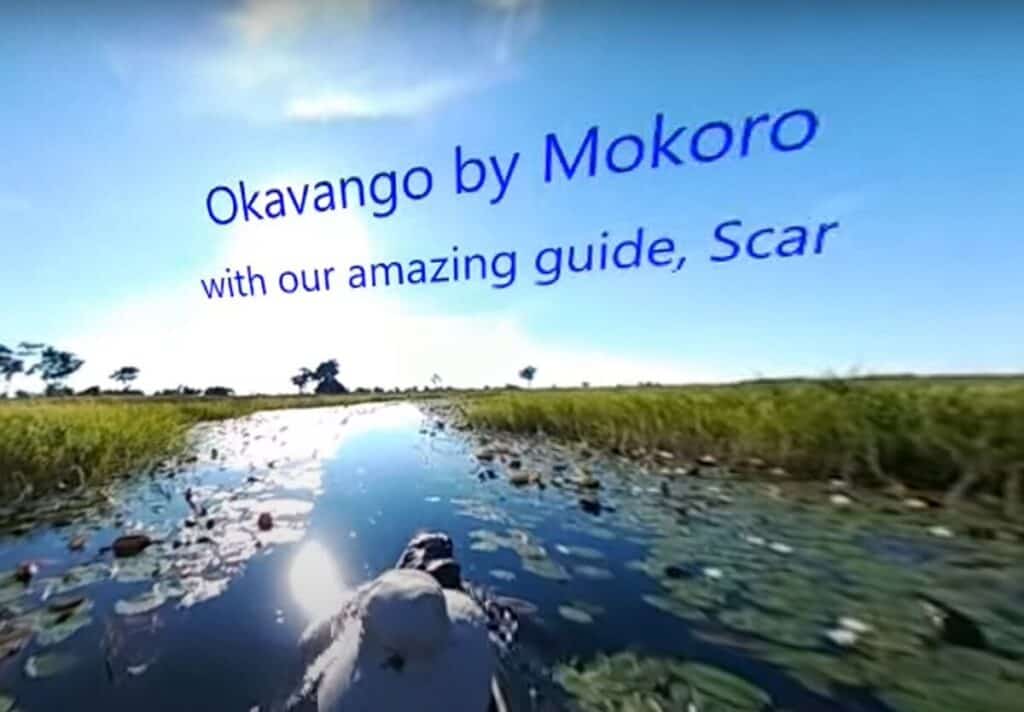
Fly around inside a 360 Panorama or Photosphere
Go from a static image to a dynamic video!
Here’s a good way to maximize the benefits of using a 360 still photo.
Motion captures people’s attention, so rather than showing a static image in PowerPoint, I like to create videos that make it feel like I’m flying around inside a 360 sphere. You can easily go from showing a single image to creating a much more dynamic video sequence.
Example: Video created from a single 360 photo
One benefit of this approach is that you choose your point-of-view during the editing process before rendering the final version. This gives you total control of the final output.
Imagine one character giving you the finger. It can be a kind finger or a very rude finger. Depending on the intent of your video, you can choose to omit the finger, or you can make it a focal point. But at least you have a choice without creating a weird gap or jump cut.
You could even show different points-of-view using one piece of 360 footage, with each sequence focusing on a different character or object. To continue with my finger example, you could show both the person giving the finger AND another person’s facial expression in response.
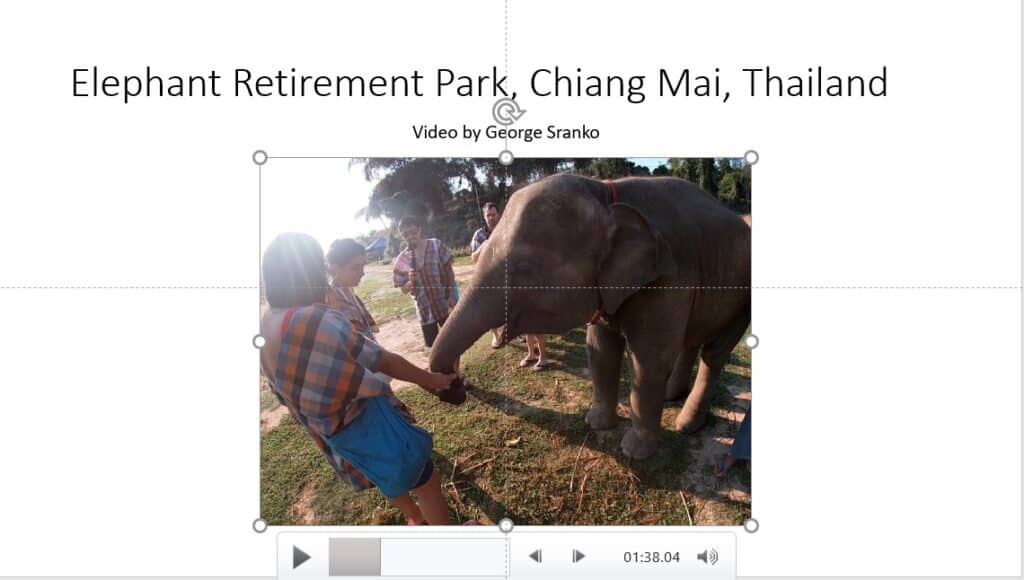
Go from 3D to 2D and Embed Your Video Directly in PowerPoint
Rather than showing a 360 video outside of PowerPoint as I’ve discussed, you can use this approach to play a regular video within PowerPoint.
Continuing from the previous tip, once you have a regular 2D edited video version you can embed this directly into your slideshow.
This is relatively straightforward, and just means that you insert video as you would normally. With my own high-resolution videos I prefer to set the Playback to Full Screen for maximum impact.
Provide Live Commentary while playing your video
You can inject some personality into your presentation by providing live commentary as the video plays. This is a good time to relate a story or add some humor, depending on the point you are trying to make. It depends on the audio track, of course. It would be confusing trying to talk over a taped conversation, for example. Or to try and yell over loud background music.
Another approach would be to record your commentary beforehand, but in my experience this doesn’t sound as authentic. If you can be loose and natural in your commentary, then go ahead. But if you have to read from a prepared script, I think you would be better to go live during the presentation. Of course, this wouldn’t be the best time to deliver a series of dates or dry statistics!
With proper planning, a short video with live commentary can make a big impression with audiences.
Intrigue Audiences by Adding Text to Your 360 Videos
The technical aspects are beyond the scope of this article, but if you have the editing know-how you can add titles and credits to your 360 videos. You could even make it more intriguing by posing questions in various spots as the video plays. This could spur audience participation, for example, if that was one of your goals.
Fly Into Your Photosphere Using Google Maps
One good way of adding context to your presentation is to fly into an image or location using Google Maps or Google Earth. This could be particularly effective if you have already posted 360 images or videos to your Google Maps account.
I highly recommend posting images to Google Maps – you could get millions of views! At the time of writing this, I have over 85 million views of my images on Google Maps. See my article: Get 1 Million Views of Your Photos with Little Effort and Big Results
You will have to become adept at using the right software for doing a screen capture. Or my preferred solution is to use Google Earth to create a tour and then to save it as a video.
Check out my related article on using Google Earth to provide geographic context, compelling visuals, and some stunning images: How to Use Google Earth to Enhance Your Presentations
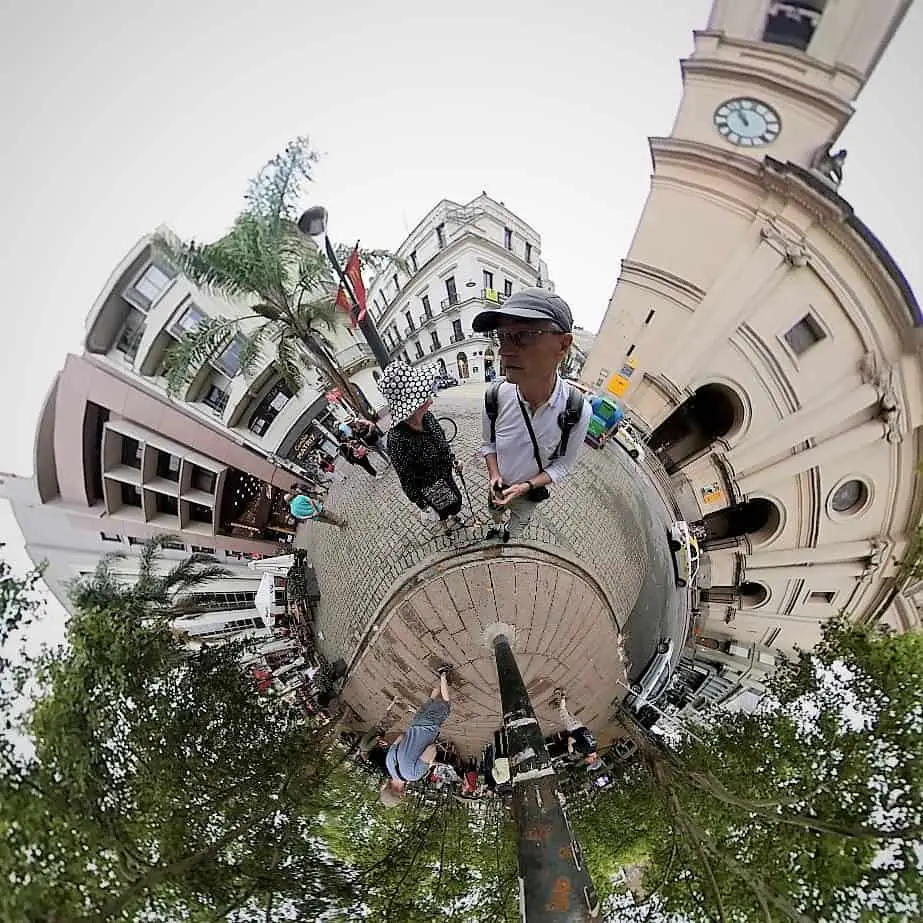
Visit a tiny planet to create some excitement
You have probably seen tiny planets and might wonder how in the heck do they get that effect. With 360 photos and videos it is relatively easy to create a tiny planet perspective. A tiny planet looks like what you would expect; a tiny planet complete with buildings, people, trees, or other objects covering the surface and extending outwards.
Here’s an example:
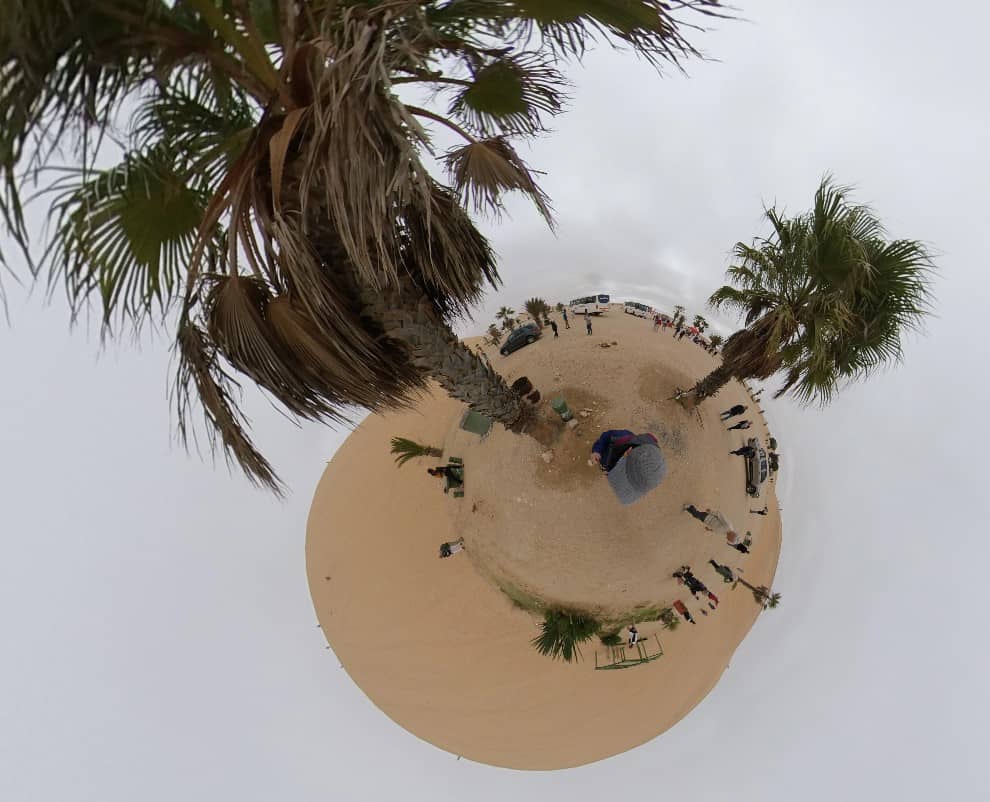
One interesting aspect with 360 videos is that you can change perspectives as the video is playing, from wide-angle, to fisheye… to tiny planet, and back again.
This is accomplished with suitable video editing software and can be worth exploring if you want to feature something quite unusual that will really grab your audience’s attention.
Good luck experimenting with 360 photos and videos to enhance your own presentations!
The Gear We Love to Travel With
We love to travel in search of exceptional wildlife viewing opportunities and for life-enhancing cultural experiences.
Here is the gear we love to travel with for recording our adventures in safety and comfort:
- Action Camera: GoPro Hero10 Black – we find these waterproof cameras are invaluable for capturing the essence of our adventures in video format. Still photos are great, but video sequences with all the sights and sounds add an extra dimension. I use short video clips to spice up many of my audiovisual presentations.
- Long Zoom Camera: Panasonic LUMIX FZ300 Long Zoom Digital Camera – I love this camera for its versatility. It goes from wide angle to 28X optical in a relatively compact design. On safari in Africa I’ve managed to get good shots of lions that the folks with long lenses kept missing – because the lions were too close! I also like the 120 fps slow-motion for action shots of birds flying and animals on the move. I call this my “bird camera.”
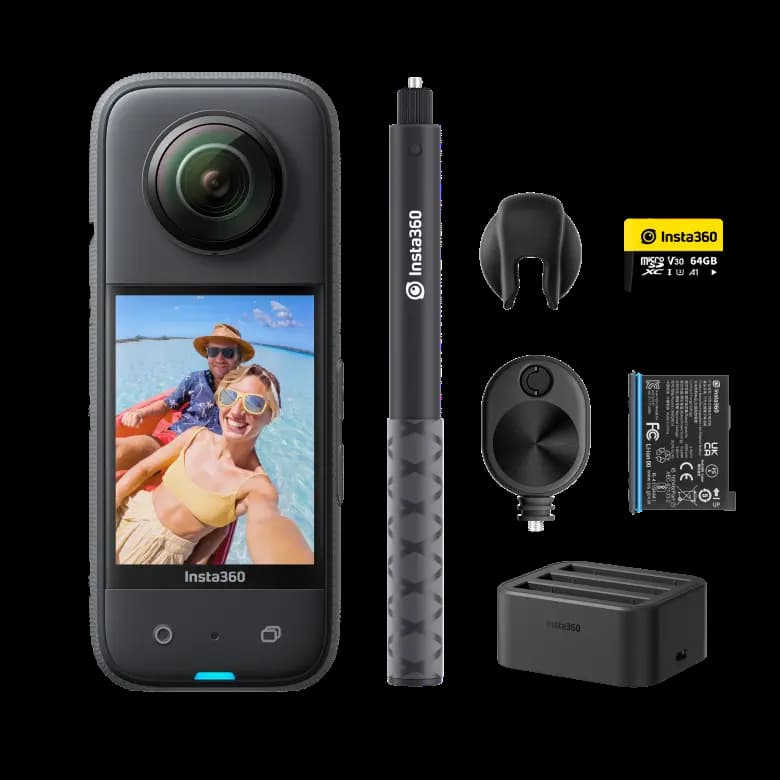
- 360 Camera: Insta360 X3 360 Degree Camera with Stabilization – see my article How to Take Impossible Shots with Your 360 Camera. This camera is literally like taking your own camera crew with you when you travel! Read my article and you’ll see why.
- Backpack camera mount: Peak Design Capture Clip
- Drone: DJI Mini 2 (Fly More Combo) – this mini drone is made for travel!
- Water Filtration: LifeStraw Go Water Filter Bottle
- Binoculars: Vortex Binoculars or Vortex Optics Diamondback HD Binoculars (good price)
See my complete series of articles on using 360 photos and videos:
How to choose your POV with 360 photos: How to Take Impossible Shots with Your 360 Camera
Using 360 photos in Google Maps: How to get millions of views online: the Platform You’ve Missed
Tips on getting views for your 360 photos: Get 1 Million Views of Your Photos with Little Effort and Big Results
