
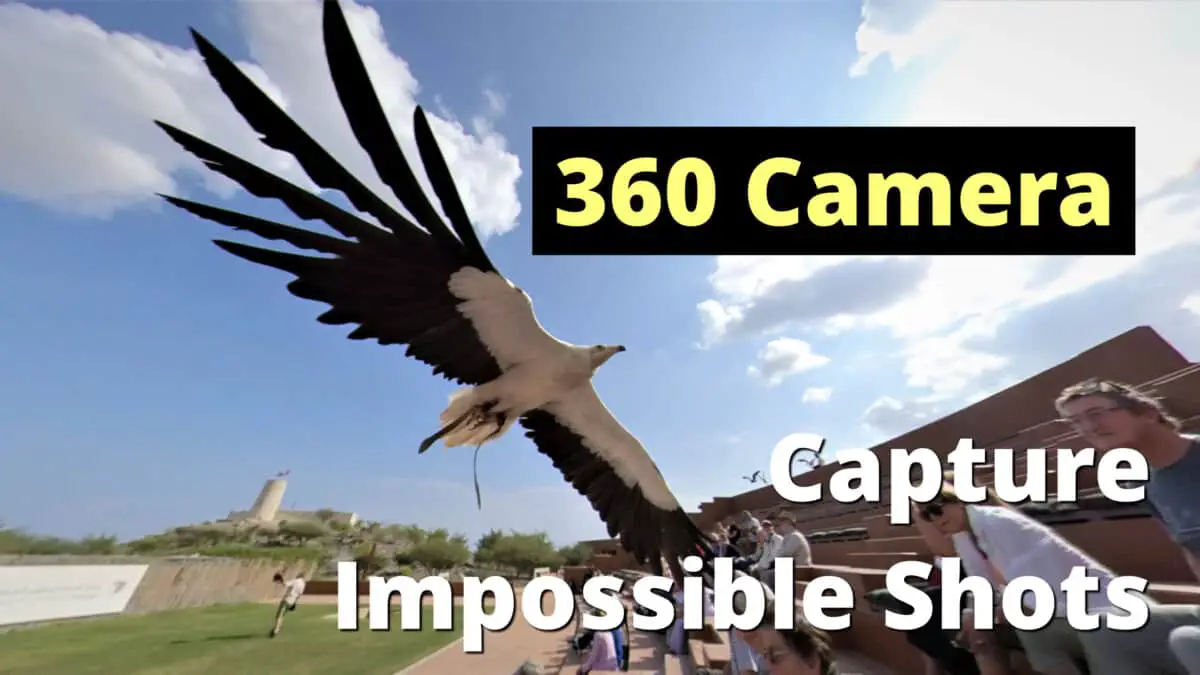
I’ve used a 360 camera in my travels around the world for over half a dozen years. I like to use the images in my presentations in front of hundreds of people, because I can show people views that are truly unusual. In this article I want to show how you can get unique and seemingly “impossible” shots whenever you travel.
A 360 camera can record everything that happens all around you. It can capture angles and points of view that you would likely miss with most regular cameras. You can have the freedom of getting close to the action without having to stay fixated on getting the perfect shot.
Once back at the editing suite, you’ll find a treasure-chest of great shots from unique angles that many others have probably missed!
It’s like having eyes in the back of your head. Wouldn’t you like to see what’s happening behind you?! There’s plenty of action back there, I’m certain!
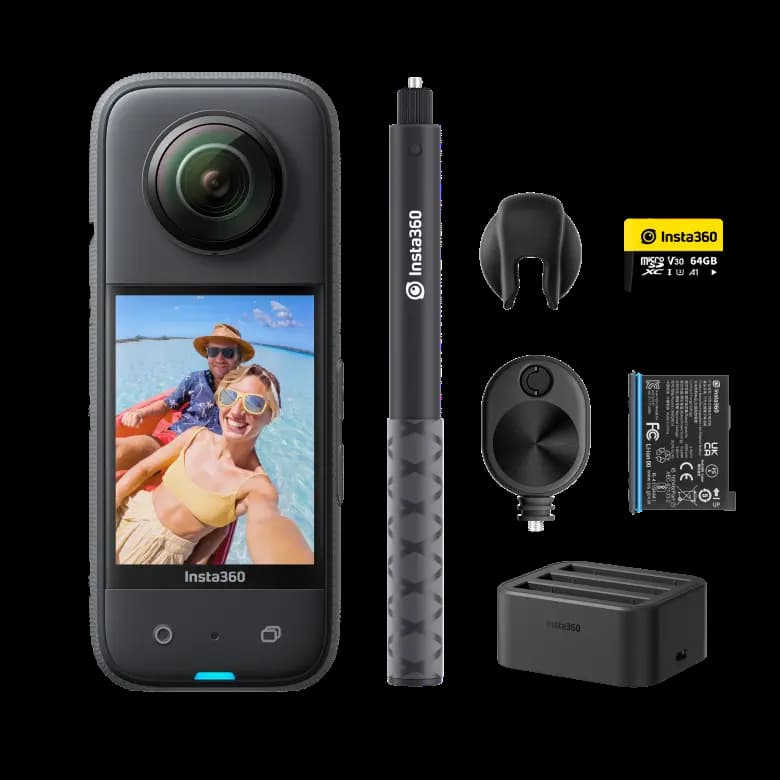
The best 360 camera for travel, based on my personal experience, is the ultraportable and waterproof Insta360 X3. This amazing camera can take seemingly impossible shots! When you extend the selfie stick full-length it almost becomes like a personal drone hovering above your head.
Here are some of my top tips for getting those impossible shots.
Tip #1: Prepare for the Unexpected
I’m a firm believer in the notion that “Luck Is What Happens When Preparation Meets Opportunity.”
This idea, attributed to Roman philosopher Seneca, reminds us that it is up to us to make our own luck. I love this quote because it captures the full promise of travelling with a 360 camera. Lucky shots happen WHEN you are prepared.
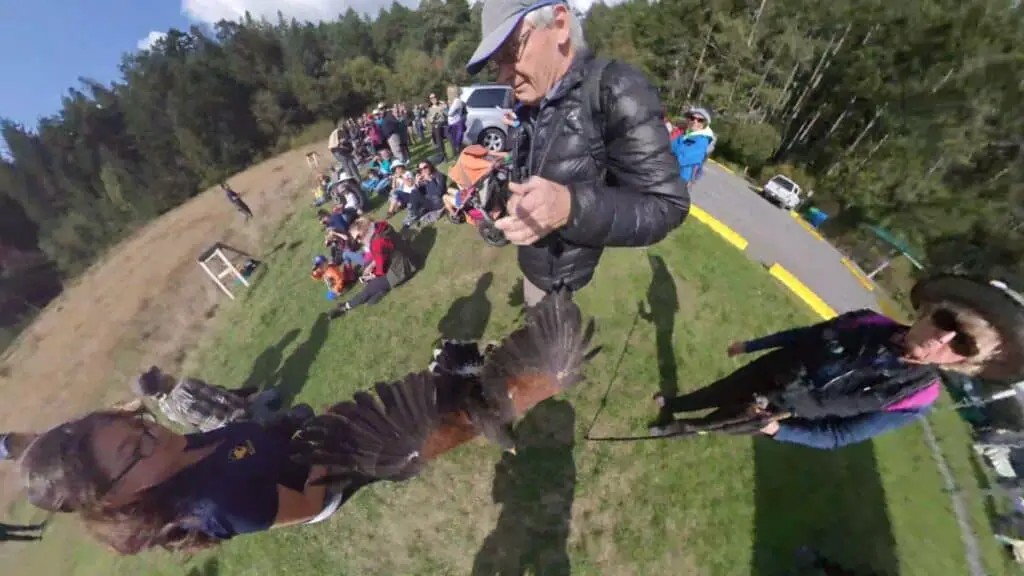
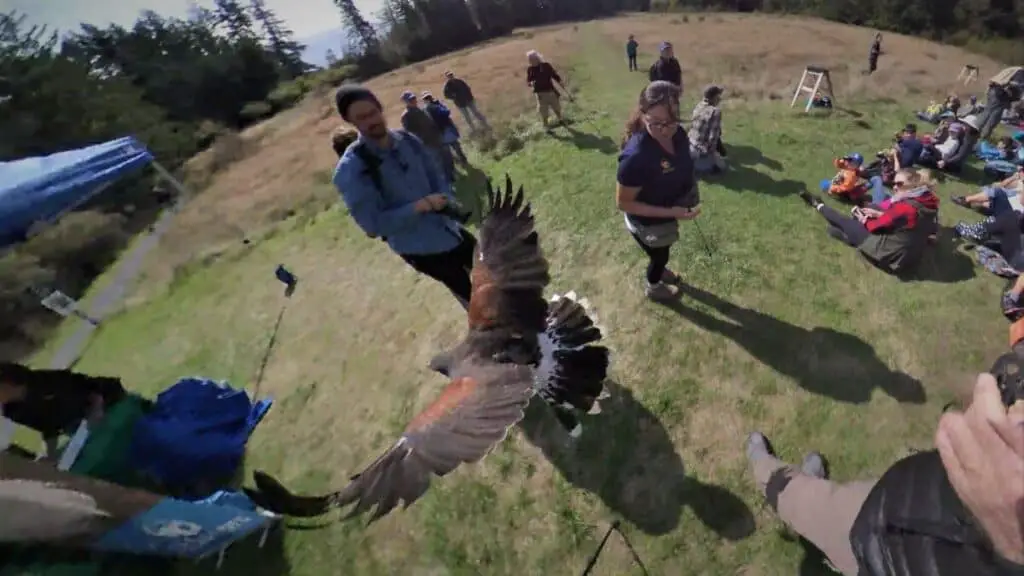
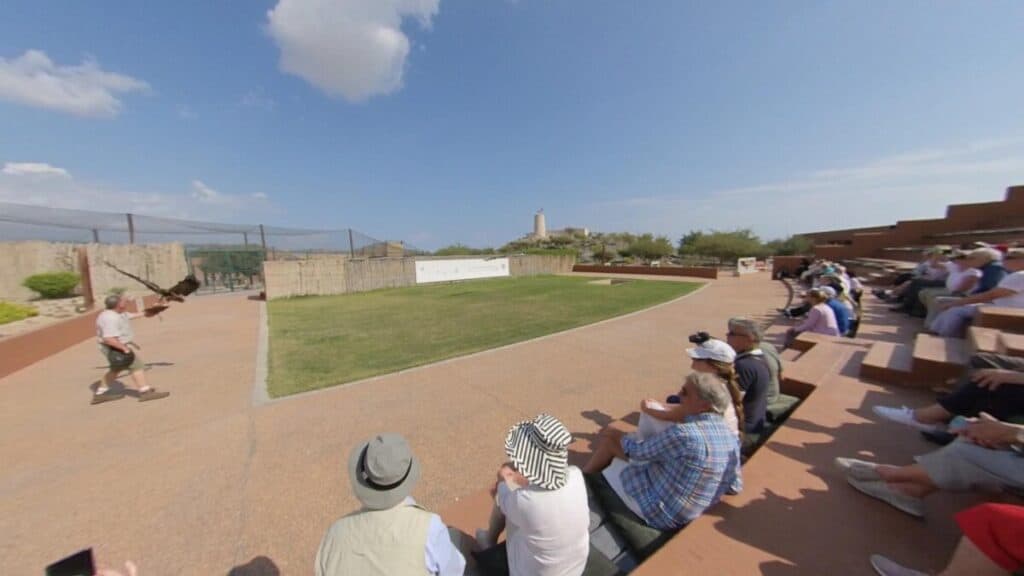
One of my favorite examples belongs to the birds. If you watch me in the accompanying video on my YouTube channel, you’ll see what I mean. You’ll see me flinch as something brown and feathery erupts from the ground and whizzes past me like a living meteor. It was totally unexpected and frightened the bejeezus out of me!
We were watching a raptor demonstration and I was keeping an eye on the presenter, when a Harris’s Hawk suddenly exploded past me and brushed me with its wings. Fortunately, I had just switched on my camera and it was recording a 360-degree video.
When I returned home and popped the SD card into my video editing computer, I was amazed to find that I had useable photos of the hawk, taken from above as it flew under my elbow, just 3 feet above the ground.
There is no way I could have taken that clip, unless by pure luck with a video camera running while pointed at the ground.
Give it a try! Having a 360 camera will change the way you approach photography!
Tip #2: Choose your Point of View at Home
This brings me to what I consider to be the most amazing thing about these cameras. With so much being recorded all around you, there’s nearly always something interesting to focus on.
But what are the chances that its always going to be captured in our frame?
With 360-degree footage or images, you have the luxury of being able to carefully review each shot in your editing suite and focusing on exactly the right POV. Or at least finding the best available and tweaking it for the best possible angle.
I refer to this as having my own camera crew with me. It’s like getting A, B, and C roll all at the same time!
I’ve used the same photo, and the same sequence or footage, for more than one image by capturing different points of view and packaging them together for a presentation or in a finished video.
Another interesting benefit is that you can be the star of your own show! With the extreme wide-angle of a 360 view, you WILL be in the shot. It can be the top of your head if that’s what you want. Or you can capture your full range of facial expressions in all their glory! The nice thing is that it’s your choice.
This is the joy of using a 360 for your action camera. Whether bike-riding, skiing, climbing, fishing, or tree climbing, you can take some awesome action sequences by showing off and putting yourself in the center of action.
When there are people or pets involved, yourself included, you are almost certain to get some interesting shots and some great footage!
Tip #3: Shoot at the highest resolution possible
One of my top tips is to shoot at the highest resolution possible. This gives you more options down the road, as you zoom in or out of the shot for exactly the right composition.
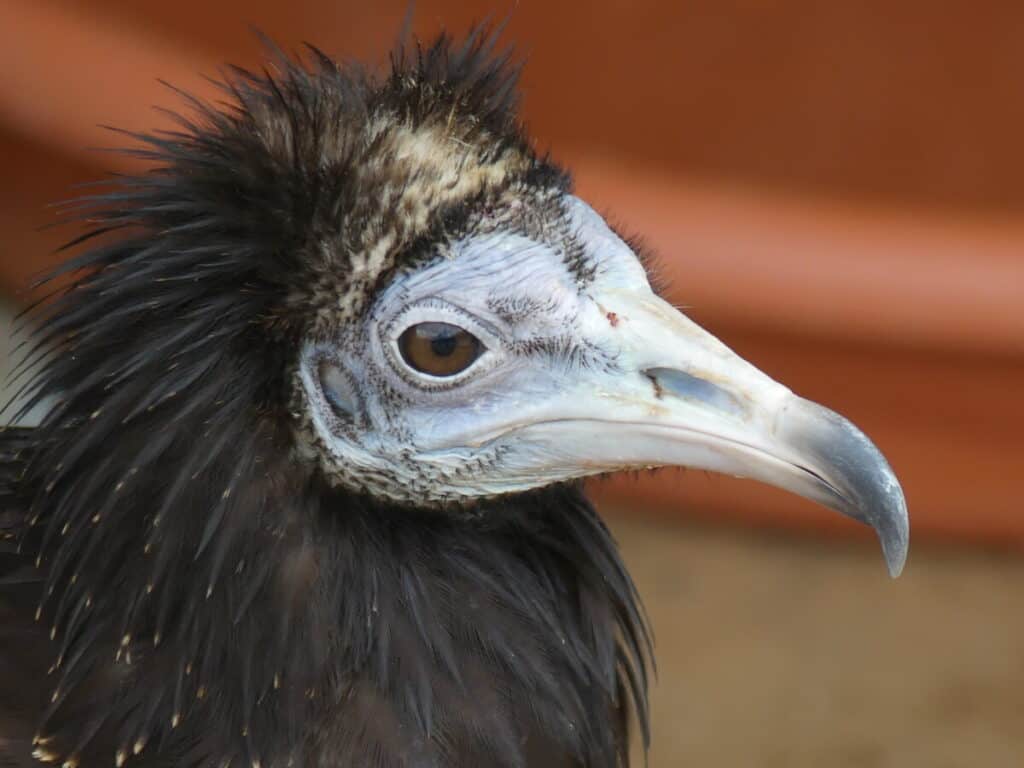
In this shot of a Griffon vulture, taken at another raptor demonstration in Oman, you’ll see that the shot is useable. It is not National Geographic quality, of course. But, given the speed of the bird and the fact that it took a lot of cropping to get the image I wanted out of a super-wide angle shot.

The original footage was taken at 5.7K – in contrast to what is considered ultra-high definition at 4K. BUT the thing to remember in the case of 360, is that those 5.7K of pixels covers an entire sphere, so the resulting resolution for a cropped frame will be about the same as a 16X9 image at 1080p.
Tip #4: Keep Your Camera Running
This can be a tough one; how long do you keep recording in the hopes of catching a great shot? A professional will take hundreds of shots per day or tons of video and then narrow everything down to whatever is worth keeping. (I wish I could be so rigorous in my own culling!)
As you can see, I like to “shoot” birds in action! Both in the wild and in staged settings like the raptor demonstrations. In the wild, there can be long stretches when they just sit there looking pretty. I will keep recording, but many times I will simply delete a shot on the spot to save room on my memory card.
As Confucius would have said if he’d had a 360 camera:
“It is easier to delete than it is to catch a bird in one hand while recording with the other.”
Or this:
“It is better to waste footage and catch a great shot, than it is to be miserly with your memory cards.”
And this:
“A fool wastes time and squanders opportunity while a genius wastes nothing but battery.”
Confucius could be wordy but wise!
The Biggest Downside: you have an extreme wide-angle
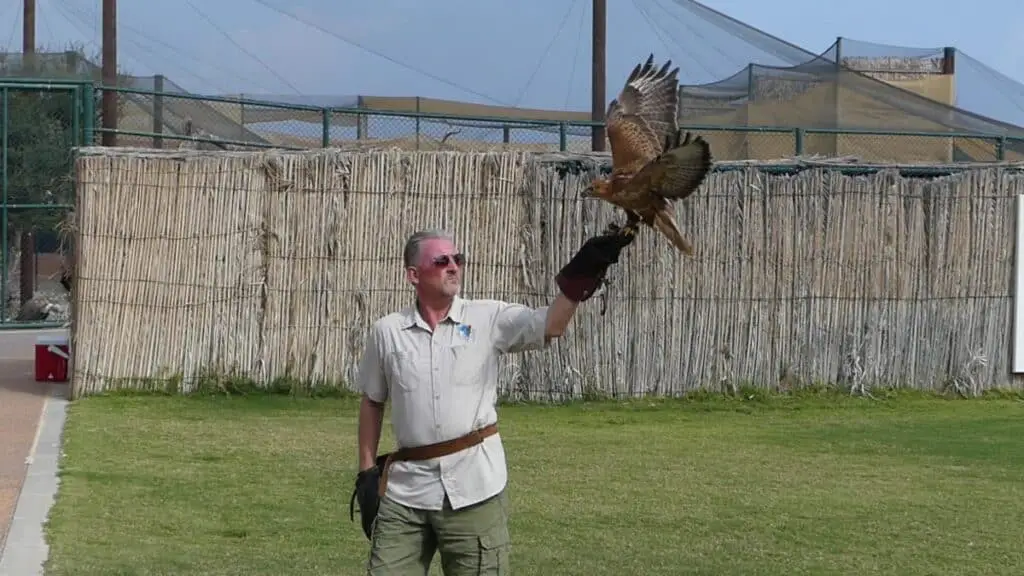
This is the downside; you capture everything in the scene, but the subject can look small and insignificant. In my video, you will see that the birds look tiny until they come close to the camera. Even the presenter or birdman looks small, so I would add some close-up views if I wanted to make a feature film out of this footage!
It is tough to fill the frame with a 360 unless you are literally on top of the person or animal. This can make it impractical to rely on a 360 as your sole camera. Consequently, I always carry my regular camera with a good zoom lens and switch back and forth.
For the “impossible” shots, it is best to keep the 360 rolling, perhaps on a tripod or in the hands of a friend, while taking close-ups, head shots, etc, with a high-resolution zoom camera.
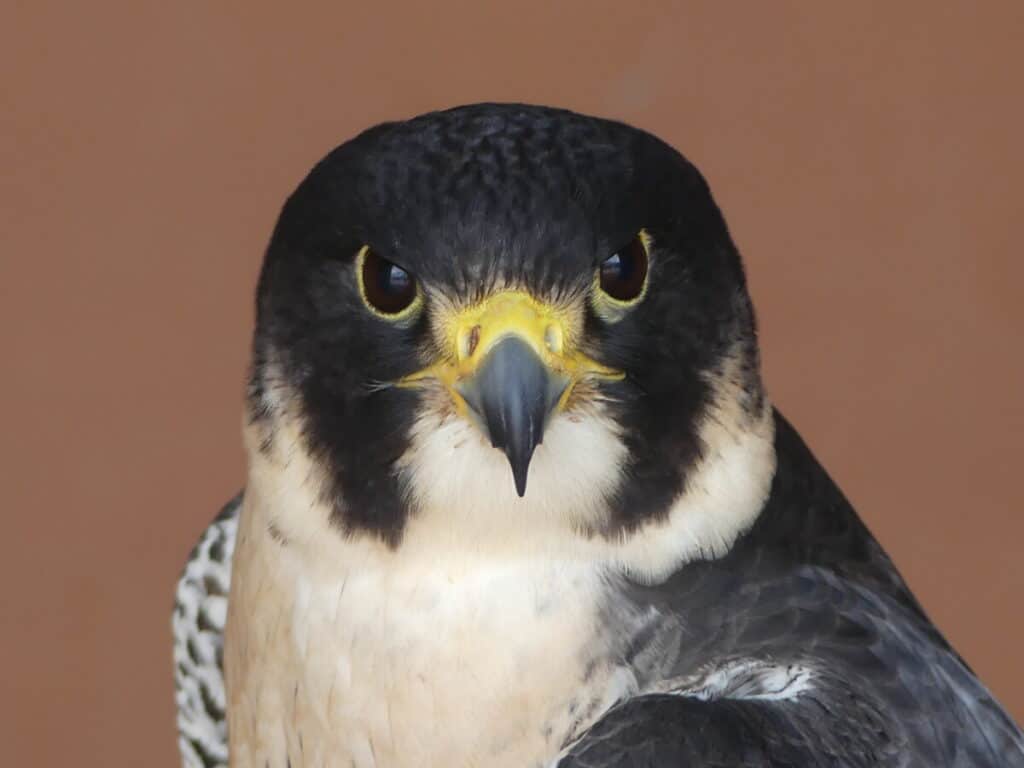
In my video, you will see that I’ve included close-up portraits of the Peregrine falcon and Griffon vulture taken with my Lumix fz300 zoom camera. They complement and strengthen my 360 footage by providing a nice detailed look at each bird that would have been difficult to capture with the 360 camera alone. Birds don’t take kindly to having a camera jabbed at them mere inches from their face!
With a 360 camera you CAN take photographs that many people would consider “impossible.” Hopefully, these tips will help!
The Gear We Love to Travel With
We love to travel in search of exceptional wildlife viewing opportunities and for life-enhancing cultural experiences.
Here is the gear we love to travel with for recording our adventures in safety and comfort:
- Action Camera: GoPro Hero10 Black – we find these waterproof cameras are invaluable for capturing the essence of our adventures in video format. Still photos are great, but video sequences with all the sights and sounds add an extra dimension. I use short video clips to spice up many of my audiovisual presentations.
- Long Zoom Camera: Panasonic LUMIX FZ300 Long Zoom Digital Camera – I love this camera for its versatility. It goes from wide angle to 28X optical in a relatively compact design. On safari in Africa I’ve managed to get good shots of lions that the folks with long lenses kept missing – because the lions were too close! I also like the 120 fps slow-motion for action shots of birds flying and animals on the move. I call this my “bird camera.”
- 360 Camera: Insta360 X3 – 360 Degree Camera, Stabilization, Waterproof – see my article How to Take Impossible Shots with Your 360 Camera. This camera is literally like taking your own camera crew with you when you travel! Read my article and you’ll see why.
- Backpack camera mount: Peak Design Capture Clip
- Drone: DJI Mini 2 (Fly More Combo) – this mini drone is made for travel!
- Water Filtration: LifeStraw Go Water Filter Bottle
- Binoculars: Vortex Binoculars or Vortex Optics Diamondback HD Binoculars (good price)
